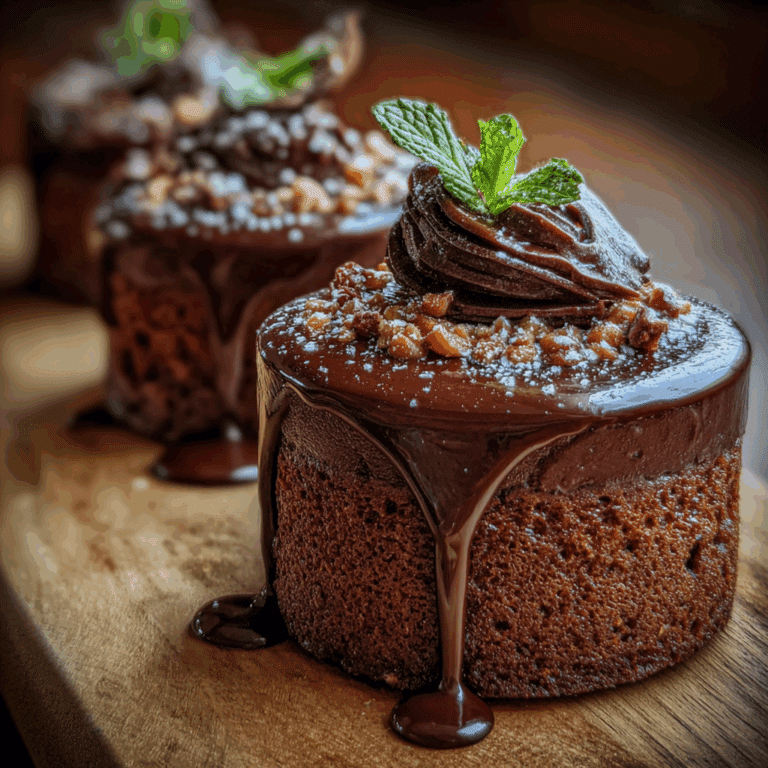
Loaded Brownie Cheesecake Cups

Discover the rich, creamy delight of Loaded Brownie Cheesecake Cups, a truly irresistible treat combining fudgy brownies and smooth cheesecake in every bite. These decadent desserts layer rich chocolate brownie bases with velvety cheesecake topping, creating a perfect balance of flavors and textures that’s hard to resist. Whether you’re looking for an indulgent dessert to impress guests or a cozy treat to satisfy your sweet tooth, Loaded Brownie Cheesecake Cups bring together the best of two beloved desserts in a fun and easy-to-make form.
Why You’ll Love This Recipe
- Double Dessert Delight: Combines the fudgy richness of brownies with the creamy smoothness of cheesecake for an incredible flavor experience.
- Simple to Make: Requires basic ingredients and straightforward steps, perfect for beginners and busy bakers alike.
- Perfect Portion Control: Made in individual cups, they’re ideal for serving at parties or enjoying without overindulging.
- Customizable Flavors: Easy to tweak with add-ins like nuts, chocolate chips, or fruit toppings to suit your taste.
- Eye-Catching Presentation: These cups look as appealing as they taste, making them a showstopper dessert for any occasion.
Ingredients You’ll Need
Each ingredient in this recipe plays a crucial role in creating the perfect Loaded Brownie Cheesecake Cups, combining to deliver moist brownies and a luscious cheesecake layer that melts in your mouth.
- Cream Cheese: Provides the smooth, tangy base essential for the classic cheesecake layer.
- Chocolate Chips: Add depth of flavor and a melty chocolate surprise in every bite.
- Brownie Mix or Homemade Brownie Batter: Forms the rich, fudgy foundation for the dessert cups.
- Sugar: Balances sweetness between the brownie and cheesecake layers for a harmonious taste.
- Eggs: Help bind both the brownie and cheesecake layers and create the perfect texture.
- Vanilla Extract: Enhances flavor, bringing out the richness in both components.
- Butter: Adds moistness and richness to the brownies, making them delectably tender.
Variations for Loaded Brownie Cheesecake Cups
Loaded Brownie Cheesecake Cups are incredibly versatile, allowing you to customize them to match your dietary needs or flavor cravings with ease. Have fun mixing things up!
- Nutty Delight: Add chopped walnuts or pecans to the brownie batter for a satisfying crunch.
- Fruit Twist: Swirl in raspberry or strawberry preserves for a fruity cheesecake flair.
- Peanut Butter Swirl: Incorporate smooth peanut butter into the cheesecake layer for a rich, nutty variation.
- Gluten-Free Option: Use a gluten-free brownie mix or alternative flour to accommodate dietary restrictions.
- Vegan Friendly: Substitute dairy and eggs with plant-based alternatives to enjoy a dairy-free version.

How to Make Loaded Brownie Cheesecake Cups
Step 1: Prepare the Brownie Batter
Start by mixing your brownie batter according to your favorite recipe or package instructions, combining ingredients until smooth and rich. This fudgy base will give your cups that classic chocolate depth.
Step 2: Make the Cheesecake Filling
Whip together softened cream cheese, sugar, eggs, and vanilla extract until silky and smooth. This mixture creates the creamy cheesecake layer that perfectly complements the dense brownie base.
Step 3: Assemble the Cups
Fill each cupcake liner halfway with brownie batter, then dollop the cheesecake mixture on top, gently swirling to create a marbled effect if desired. This layering ensures every bite delivers both flavors in harmony.
Step 4: Bake
Bake the assembled cups at the suggested temperature until the cheesecake layer is set and the brownies are cooked through but still fudgy. Avoid overbaking to keep the perfect texture.
Step 5: Cool and Serve
Allow the cups to cool completely before removing from the liners. Chill in the refrigerator for a few hours to let the flavors meld and the cheesecake firm up for that luscious finish.
Pro Tips for Making Loaded Brownie Cheesecake Cups
- Use Room Temperature Ingredients: Soften your cream cheese and butter before mixing to ensure a smooth batter with no lumps.
- Don’t Overmix the Cheesecake Layer: Mix just until smooth to avoid incorporating excess air, which can cause cracks.
- Swirling Technique: Use a toothpick or skewer to softly swirl the layers for an attractive marbled look without mixing them completely.
- Check for Doneness: Insert a toothpick near the edge; it should come out with moist crumbs but no wet batter.
- Chill Thoroughly: Refrigerate at least 2 hours before serving to enhance flavors and texture.
How to Serve Loaded Brownie Cheesecake Cups
Garnishes
Top your cups with whipped cream, a drizzle of chocolate or caramel sauce, fresh berries, or a sprinkle of chopped nuts to add texture, color, and extra flavor appeal.
Side Dishes
Pair these cups with a scoop of vanilla ice cream or a fresh fruit salad to balance their richness, making your dessert experience even more delightful.
Creative Ways to Present
Serve Loaded Brownie Cheesecake Cups in clear glass jars or mini mason jars for a rustic look, or arrange them on a tiered dessert stand to impress guests at your next gathering.
Make Ahead and Storage
Storing Leftovers
Keep leftover Loaded Brownie Cheesecake Cups in an airtight container in the refrigerator for up to 4 days to maintain freshness and texture.
Freezing
Freeze individual cups wrapped tightly in plastic wrap and placed in a freezer-safe container; thaw overnight in the refrigerator before serving for a convenient make-ahead dessert.
Reheating
For a warm treat, allow refrigerated cups to come to room temperature or warm gently for about 10 seconds in the microwave—but be careful not to overheat and spoil the cheesecake texture.
FAQs
Can I use store-bought brownie mix for this recipe?
Absolutely! Store-bought brownie mix works great and saves time, although homemade batter will give you a more personalized flavor.
How long do Loaded Brownie Cheesecake Cups keep in the fridge?
They stay fresh for up to 4 days when stored in an airtight container in the refrigerator.
Can I make these gluten-free?
Yes, simply substitute the brownie base with a gluten-free brownie mix or recipe, and ensure all other ingredients are gluten-free.
Do I have to use cream cheese?
Cream cheese is essential for the cheesecake layer’s taste and texture, but you can try alternatives like mascarpone or ricotta, though the results may vary slightly.
Can I prepare this dessert ahead of time for a party?
Definitely! These cups can be made a day ahead and chilled, making them a perfect make-ahead dessert to reduce stress on serving day.
Final Thoughts
Loaded Brownie Cheesecake Cups bring together two classic desserts in an easy-to-make, wonderfully indulgent treat that’s perfect for any occasion. Their combination of fudgy brownies and creamy cheesecake creates a dessert so satisfying, it’s hard to share. Whether you’re baking for family, friends, or yourself, you’ll love how these cups bring sweet joy to every bite. Give this recipe a try—you might just find your new favorite dessert!
Related Posts
PrintLoaded Brownie Cheesecake Cups

Loaded Brownie Cheesecake Cups are a decadent dessert combining fudgy chocolate brownie bases with creamy, smooth cheesecake toppings. Perfect for parties or a cozy treat, these individual portions offer a delightful blend of rich chocolate and tangy cheesecake in every bite, customizable with various add-ins and easy to prepare.
- Prep Time: 15 minutes
- Cook Time: 25-30 minutes
- Total Time: 3 hours (including chilling time)
- Yield: 12 servings 1x
- Category: Dessert
- Method: Baking
- Cuisine: American
- Diet: Gluten Free (if using gluten-free brownie mix)
Ingredients
Brownie Base
- 1 box brownie mix or homemade brownie batter (enough for 12 servings)
- 1/2 cup butter, melted
- 2 large eggs
- 1/4 cup chocolate chips (optional)
- Optional: 1/2 cup chopped walnuts or pecans (for nutty variation)
Cheesecake Layer
- 16 oz (2 cups) cream cheese, softened
- 2/3 cup sugar
- 2 large eggs
- 1 teaspoon vanilla extract
- Optional: 2 tablespoons peanut butter (for peanut butter swirl)
- Optional: 2 tablespoons raspberry or strawberry preserves (for fruit twist)
Instructions
- Prepare the Brownie Batter: Start by mixing your brownie batter according to your favorite recipe or package instructions, combining ingredients until smooth and rich. This fudgy base will give your cups that classic chocolate depth.
- Make the Cheesecake Filling: Whip together softened cream cheese, sugar, eggs, and vanilla extract until silky and smooth. For variations, gently fold in peanut butter for a swirl or preserves for a fruity twist.
- Assemble the Cups: Fill each cupcake liner halfway with brownie batter, then dollop the cheesecake mixture on top, gently swirling with a toothpick to create a marbled effect if desired. This layering ensures every bite delivers both flavors in harmony.
- Bake: Bake the assembled cups at 325°F (163°C) for about 25-30 minutes or until the cheesecake layer is set and brownies are cooked through but still fudgy. Insert a toothpick near the edge to check; it should come out with moist crumbs but no wet batter.
- Cool and Serve: Allow the cups to cool completely before removing from the liners. Chill in the refrigerator for at least 2 hours to let the flavors meld and the cheesecake firm up for a luscious finish.
Notes
- Use room temperature ingredients: Soften cream cheese and butter before mixing for a smooth batter without lumps.
- Don’t overmix the cheesecake layer to avoid incorporating too much air which may cause cracks.
- Use a toothpick to gently swirl layers for an attractive marbled appearance without fully mixing.
- Check doneness by inserting a toothpick near the edge; it should come out with moist crumbs, not wet batter.
- Chill thoroughly for at least 2 hours for the best flavor and texture.
- Store leftovers in an airtight container in the refrigerator for up to 4 days.
- Freeze individual cups wrapped in plastic wrap and stored in a freezer-safe container; thaw overnight in the fridge before serving.
- Reheat refrigerated cups gently for about 10 seconds in the microwave for a warm treat, avoiding overheating.
Nutrition
- Serving Size: 1 cup
- Calories: 320
- Sugar: 25g
- Sodium: 210mg
- Fat: 20g
- Saturated Fat: 12g
- Unsaturated Fat: 6g
- Trans Fat: 0g
- Carbohydrates: 30g
- Fiber: 2g
- Protein: 5g
- Cholesterol: 70mg
Keywords: brownie, cheesecake, dessert cups, fudgy brownie, creamy cheesecake, party dessert, easy dessert, gluten free option