Irresistible Butterfinger Candy Bar Poke Cake Treat
If you have a serious sweet tooth and love combining rich, creamy textures with a satisfying crunch, you’re in for a real treat with this Butterfinger Candy Bar Poke Cake. This delightful dessert twists the classic poke cake by infusing sticky layers of creamy filling into moist cake, then topping it generously with crushed Butterfinger candy bars that deliver that iconic, irresistible crunch. Whether you’re serving this for a celebration, a weekend treat, or simply to satisfy that sugar craving, the Butterfinger Candy Bar Poke Cake will quickly become your new favorite dessert to bake and share.
Why You’ll Love This Recipe
- An easy showstopper: This recipe elevates a simple cake into a crowd-pleasing dessert packed with layers of flavor and texture.
- Every bite is a delight: The creamy filling combined with crunchy Butterfinger bits creates an addictive texture contrast.
- Perfect for all occasions: Whether it’s a birthday or a casual get-together, this poke cake fits right in.
- Simple ingredients, spectacular results: You use everyday pantry staples alongside the star candy bar for a dessert that feels gourmet.
- Customizable to your taste: You can easily tweak the layers or toppings to suit your preferences or dietary needs.
Ingredients You’ll Need
Each ingredient plays a crucial role in achieving the perfect balance of moist cake, creamy filling, and sweet crunch. Using straightforward ingredients also means you can easily find what you need at your local store and whip this up in no time.
- Yellow cake mix: A classic base that provides a moist, buttery flavor and golden color.
- Butterfinger candy bars: The star ingredient offering signature crispiness and a peanut butter crunch that transforms the cake.
- Sweetened condensed milk: For soaking the cake, making it incredibly tender and adding subtle sweetness.
- Vanilla pudding mix: Creates the creamy filling that melts perfectly between cake layers.
- Milk: Needed to prepare the pudding filling to silky, scoopable perfection.
- Cool whip or whipped topping: Adds lightness and airy texture to the filling and frosting.
- Butter and sugar: Optional for enhancing flavors or creating a caramel drizzle as a topping.
Variations for Butterfinger Candy Bar Poke Cake
Feel free to get creative with your Butterfinger Candy Bar Poke Cake! Whether you want to swap ingredients or add your own twist, this recipe is a great canvas to customize according to your mood, dietary requirements, or party themes.
- Nut-free option: Use a candy bar alternative without nuts while keeping the same layered textures.
- Chocolate lover’s twist: Add cocoa powder to the cake mix or sprinkle mini chocolate chips on top.
- Salted caramel addition: Drizzle homemade or store-bought salted caramel sauce before serving for extra indulgence.
- Healthier alternative: Use sugar-free pudding and light whipped topping to cut back calories.
- Peanut butter lovers unite: Mix peanut butter into the filling to amplify the nutty richness.

How to Make Butterfinger Candy Bar Poke Cake
Step 1: Bake the Cake
Prepare the yellow cake mix according to package instructions, then bake it in a 9×13 inch pan until golden and a toothpick comes out clean. Let it cool slightly but keep it warm for the next step.
Step 2: Poke the Cake
Using the handle of a wooden spoon or a fork, poke holes all over the warm cake. These holes allow the sweetened condensed milk to soak in deeply, resulting in a moist, luscious crumb.
Step 3: Pour Sweetened Condensed Milk
Slowly pour the sweetened condensed milk evenly over the poked holes, ensuring every bit of the cake gets soaked for maximum flavor and moisture.
Step 4: Prepare the Creamy Filling
Mix the vanilla pudding powder with milk until thickened, then gently fold in whipped topping to create a fluffy, smooth filling that’s perfect for layering on top.
Step 5: Spread the Filling
Once the cake has absorbed the condensed milk, spread the creamy vanilla pudding filling evenly across the top to fill those sweet pockets and add a luscious texture.
Step 6: Add the Crunchy Topping
Crush the Butterfinger candy bars into coarse bits and sprinkle generously over the creamy layer, finishing off this dessert with that signature crunch and peanut butter flavor.
Step 7: Chill and Serve
Refrigerate the cake for at least two hours to allow all the flavors to meld beautifully. Serve cold for a refreshing, irresistible treat.
Pro Tips for Making Butterfinger Candy Bar Poke Cake
- Use warm cake for poking: Poking while the cake is warm helps the condensed milk soak in better, making it moister.
- Don’t overmix pudding: Stir the pudding just until thickened for the best creamy texture without becoming grainy.
- Crush candy bars by hand: Crushing Butterfingers gently retains the perfect size pieces for texture rather than a fine powder.
- Chill thoroughly: The cake tastes best after some chill time allows the pudding and candy to meld with the cake layers.
- Customize your topping: Add a drizzle of chocolate or caramel sauce over the candy bits for even more visual appeal and richness.
How to Serve Butterfinger Candy Bar Poke Cake
Garnishes
Top with extra crushed Butterfinger pieces, a sprinkle of chopped peanuts, or a drizzle of melted chocolate or caramel for added flair and flavor bursts.
Side Dishes
Pair it with a scoop of vanilla ice cream or a dollop of freshly whipped cream to balance the dense, sweet cake with cool creaminess.
Creative Ways to Present
Serve in individual clear cups to showcase the beautiful layers or cut into neat squares and place on a decorative platter, garnishing each piece with a tiny Butterfinger shard.
Make Ahead and Storage
Storing Leftovers
Place the Butterfinger Candy Bar Poke Cake in an airtight container and refrigerate for up to 4 days to maintain freshness and texture.
Freezing
You can freeze the cake by wrapping it tightly with plastic wrap and aluminum foil, then thaw overnight in the refrigerator before serving for best results.
Reheating
This dessert is best enjoyed cold, so skip reheating as it alters the creamy filling and crunchy candy texture.
FAQs
Can I use homemade cake instead of a cake mix?
Absolutely! A homemade yellow or vanilla cake works wonderfully and adds a personal touch, just ensure it’s moist and cool before poking.
What’s the best way to crush Butterfinger candy bars?
Place the candy bars in a sealed plastic bag and gently use a rolling pin or your hands to break into pieces, aiming for bite-size chunks rather than powder.
Can I substitute the pudding flavor?
Yes! While vanilla pudding complements the Butterfinger flavor perfectly, chocolate or peanut butter pudding can also make a delicious variation.
Is this cake good for parties and large gatherings?
Definitely. The Butterfinger Candy Bar Poke Cake is a crowd-pleaser that’s easy to serve and transport, ideal for any celebration.
Can I make this recipe dairy-free?
By swapping traditional pudding, condensed milk, and whipped topping with dairy-free alternatives, this recipe can be adapted for dairy-sensitive guests.
Final Thoughts
There’s no denying the charm of a Butterfinger Candy Bar Poke Cake—moist, creamy, and crunchy all at once. It’s a dessert that brings joy to any table, a recipe to keep in your bakers’ arsenal when you want to impress with little fuss. Give it a try, share with friends and family, and watch this sweet sensation disappear in no time!
Related Posts
- Why Homemade Peach Ice Cream Tastes Best
- Why Baby Lemon Impossible Pies Are Irresistible Treats
- How to Make Raspberry Lemon Tart Bars Easily
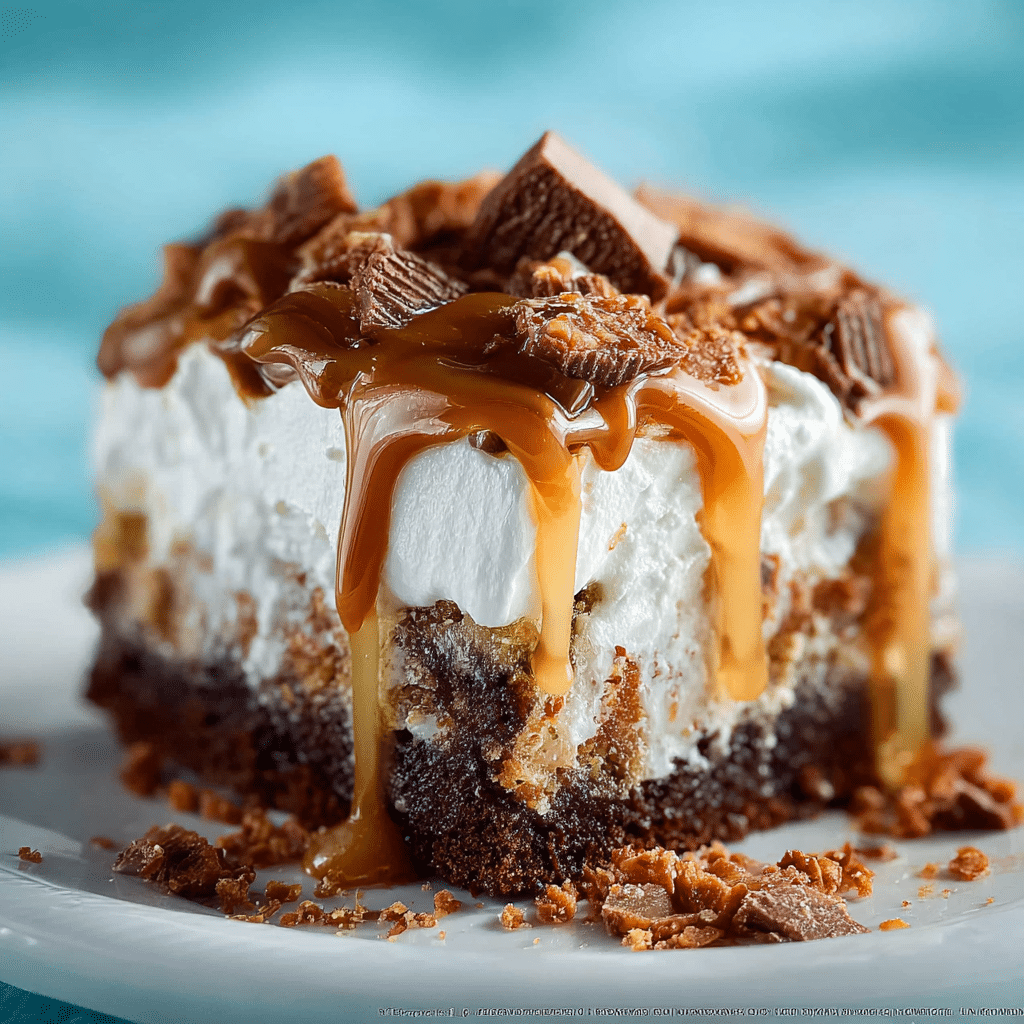
Butterfinger Candy Bar Poke Cake

Butterfinger Candy Bar Poke Cake is a delightful dessert featuring a moist yellow cake soaked with sweetened condensed milk and layered with creamy vanilla pudding and whipped topping. This rich, creamy cake is topped generously with crunchy crushed Butterfinger candy bars, delivering a perfect balance of smooth texture and irresistible peanut butter crunch. Ideal for celebrations, casual gatherings, or whenever you crave a sweet treat, this poke cake is easy to make with simple pantry ingredients and offers multiple customization options.
- Prep Time: 20 minutes
- Cook Time: 30 minutes
- Total Time: 2 hours 50 minutes
- Yield: 12 servings 1x
- Category: Dessert
- Method: Baking
- Cuisine: American
- Diet: Contains dairy and nuts
Ingredients
Cake
- 1 box yellow cake mix (plus ingredients called for on the box)
Soaking Syrup
- 1 can (14 oz) sweetened condensed milk
Creamy Filling
- 1 package (3.4 oz) instant vanilla pudding mix
- 2 cups milk
- 1 container (8 oz) Cool Whip or whipped topping
Topping
- 3–4 Butterfinger candy bars, crushed into coarse bits
- Optional: Butter and sugar for caramel drizzle
Instructions
- Step 1: Bake the Cake – Prepare the yellow cake mix according to package instructions, then bake it in a 9×13 inch pan until golden brown and a toothpick inserted in the center comes out clean. Let the cake cool slightly but keep it warm for the next step.
- Step 2: Poke the Cake – Using the handle of a wooden spoon or a fork, poke holes all over the warm cake surface. These holes allow the sweetened condensed milk to soak in deeply, resulting in a moist, luscious crumb.
- Step 3: Pour Sweetened Condensed Milk – Slowly pour the sweetened condensed milk evenly over the poked holes, ensuring that every part of the cake gets soaked for maximum flavor and moisture.
- Step 4: Prepare the Creamy Filling – In a bowl, mix the vanilla pudding powder with milk until thickened according to package directions, then gently fold in the whipped topping to create a fluffy, smooth filling perfect for layering on the cake.
- Step 5: Spread the Filling – Once the cake has absorbed the sweetened condensed milk, spread the creamy vanilla pudding filling evenly across the top to fill the sweet pockets and add luscious texture.
- Step 6: Add the Crunchy Topping – Crush the Butterfinger candy bars gently by hand into coarse bits and sprinkle generously over the creamy filling layer, finishing the dessert with a signature peanut butter crunch.
- Step 7: Chill and Serve – Refrigerate the cake for at least two hours to allow all flavors to meld beautifully. Serve cold as a refreshing and irresistible treat.
Notes
- Use warm cake for poking to help the condensed milk soak in better and keep the cake moist.
- Don’t overmix pudding; stir just until thickened for the best creamy texture without graininess.
- Crush Butterfinger candy bars gently by hand to retain bite-sized chunks and texture.
- Chill thoroughly before serving so the pudding and candy meld well with the cake layers.
- Customize the topping by adding drizzles of chocolate or caramel sauce over the candy bits for extra richness.
Nutrition
- Serving Size: 1 slice (1/12th of cake)
- Calories: 420
- Sugar: 38g
- Sodium: 320mg
- Fat: 18g
- Saturated Fat: 8g
- Unsaturated Fat: 7g
- Trans Fat: 0.5g
- Carbohydrates: 58g
- Fiber: 1g
- Protein: 6g
- Cholesterol: 40mg
Keywords: butterfinger poke cake, candy bar cake, layered dessert, creamy cake, crunchy topping, sweet dessert, peanut butter dessert