How to Make No-Bake Banana Pudding Cheesecake

If you’re craving a luscious dessert that combines the rich creaminess of cheesecake with the nostalgic flavors of banana pudding, you’re in for a treat with this No-Bake Banana Pudding Cheesecake. This dessert brings together layers of smooth cream cheese filling, ripe bananas, and vanilla wafers without any oven time, making it a true crowd-pleaser that’s quick and simple to prepare. Whether you’re whipping it up for a casual family gathering or impressing guests at a summer party, this No-Bake Banana Pudding Cheesecake is a creamy, dreamy delight that you’ll want to make again and again.
Why You’ll Love This Recipe
- Effortless preparation: No need to turn on the oven or wait for baking—everything comes together in minutes.
- Classic comfort flavors: Combines the beloved taste of banana pudding with silky cheesecake richness.
- Perfect texture balance: Creamy filling meets crunchy vanilla wafers for decadent layers.
- Great for all occasions: From birthdays to potlucks, it’s a dessert that suits any event.
- Adaptable and forgiving: Simple ingredient swaps let you cater to dietary preferences easily.
Ingredients You’ll Need
Gathering the right ingredients is essential to get that perfect flavor and texture in your No-Bake Banana Pudding Cheesecake. Each component plays a crucial role, from the sweet bananas that add freshness to the creamy elements that give it a melt-in-your-mouth consistency.
- Cream cheese: Provides the rich, smooth base that’s essential for the cheesecake’s creamy texture.
- Sweetened condensed milk: Adds natural sweetness and helps achieve the perfect set without baking.
- Whipped topping: Lightens the filling to keep it fluffy and airy instead of dense.
- Instant vanilla pudding mix: Boosts the classic banana pudding flavor and thickens the filling nicely.
- Ripe bananas: Bring natural sweetness and that unmistakable banana pudding signature.
- Vanilla wafers: Create a nostalgic, crispy crust and charming layers that complement the smooth filling.
- Butter: Mixed with wafers to form the crust that holds everything together perfectly.
Variations for No-Bake Banana Pudding Cheesecake
Feel free to tweak this recipe to match whatever flavors or dietary needs you’re aiming for. The flexibility of this No-Bake Banana Pudding Cheesecake means you can make it your own without losing what makes it so delicious.
- Gluten-free option: Use gluten-free vanilla wafers or crushed gluten-free cookies for the crust.
- Dairy-free twist: Substitute cream cheese and whipped topping with plant-based alternatives.
- Extra banana flavor: Add banana extract or mashed banana into the filling for an intensified banana punch.
- Add nuttiness: Sprinkle crushed pecans or walnuts between layers for added crunch.
- Chocolate lover’s version: Mix in a layer of chocolate pudding or sprinkle chocolate chips for extra decadence.

How to Make No-Bake Banana Pudding Cheesecake
Step 1: Prepare the crust
Start by crushing vanilla wafers into fine crumbs, then combine them with melted butter. Press this mixture firmly into the bottom of a springform pan or a pie dish to form the cheesecake crust. Chill while you prepare the filling.
Step 2: Mix the filling
In a large bowl, beat softened cream cheese until smooth. Gradually add in the sweetened condensed milk and instant vanilla pudding mix, stirring until fully combined. Fold in the whipped topping gently to keep the mixture light and fluffy.
Step 3: Add the bananas
Slice ripe bananas and layer them over the chilled crust. Then pour half of the filling over the bananas, spreading it evenly. Repeat with a second banana layer and the remaining filling for luscious layers.
Step 4: Assemble and chill
Top the final layer of filling with crushed vanilla wafers or a few banana slices for garnish. Cover the cheesecake with plastic wrap and refrigerate for at least 4 hours, ideally overnight, to let it set perfectly.
Pro Tips for Making No-Bake Banana Pudding Cheesecake
- Use ripe bananas: The sweeter and softer the bananas, the more flavorful your dessert will be.
- Beat cream cheese thoroughly: Make sure it’s room temperature and smooth before adding other ingredients.
- Don’t overmix whipped topping: Fold gently to keep the filling airy and prevent it from becoming dense.
- Chill adequately: Allowing enough chilling time ensures the cheesecake holds its shape well.
- Layer wisely: Even layering maximizes flavor distribution and makes each slice look beautiful.
How to Serve No-Bake Banana Pudding Cheesecake
Garnishes
Top your slices with fresh banana slices, whipped cream dollops, or a sprinkle of crushed vanilla wafers to amplify the classic look and flavor. A light dusting of cinnamon or nutmeg also elevates the aroma beautifully.
Side Dishes
This dessert pairs wonderfully with simple fruit salads, fresh berries, or a scoop of vanilla ice cream. The side dishes should complement—not overpower—the delicate sweetness of the cheesecake.
Creative Ways to Present
Try serving this cheesecake in individual mason jars for a fun, portable option, or layer it in a clear trifle bowl to showcase the lovely banana and wafer layers for visual appeal at your next gathering.
Make Ahead and Storage
Storing Leftovers
Store any leftover No-Bake Banana Pudding Cheesecake in an airtight container or cover tightly with plastic wrap in the refrigerator. It stays fresh and creamy for up to 4 days, perfect for enjoying over several days.
Freezing
You can freeze slices on a parchment-lined tray first, then transfer to a freezer-safe container. Frozen cheesecake will keep for about 1 month; just thaw in the refrigerator overnight before serving to maintain its texture.
Reheating
This cheesecake is best enjoyed chilled and typically does not require reheating. If needed, let it sit at room temperature for about 15 minutes to soften slightly before serving.
FAQs
Can I use fresh homemade pudding instead of instant mix?
Yes, homemade pudding can work well but keep in mind it might affect the texture and setting time. Instant pudding mix helps the cheesecake set firmly without baking.
How ripe should the bananas be for this recipe?
Bananas should be ripe with yellow skin and some brown spots for maximum sweetness and softness—it adds great flavor without being mushy.
Is there a way to make this recipe vegan?
Absolutely! Use vegan cream cheese, coconut whipped topping, plant-based milk, and vegan cookie substitutes to create a delicious vegan version.
Can I make this dessert gluten-free?
Yes, by swapping vanilla wafers with gluten-free cookies or crushed graham crackers, you can easily make this dessert gluten-free.
How long will the No-Bake Banana Pudding Cheesecake keep in the fridge?
It will stay fresh for about 3 to 4 days if stored properly covered in the refrigerator.
Final Thoughts
This No-Bake Banana Pudding Cheesecake is truly the perfect blend of comfort and elegance in a dessert. Its creamy layers, combined with the nostalgic flavors of banana pudding, create a no-fuss recipe that’s sure to impress your friends and family. Give it a try—you’re going to love how effortless it is to make and how irresistibly delicious it tastes!
Related Posts
- Why Rhubarb Shortbread Bars Are Perfect Treats
- Quick Easter M&M Cookie Bars to Try Now
- Why Pineapple Dump Cake Is Your Next Favorite Dessert
No-Bake Banana Pudding Cheesecake
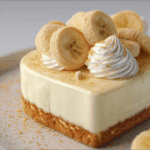
No-Bake Banana Pudding Cheesecake is a delightful dessert combining creamy cheesecake filling, ripe bananas, and vanilla wafers for nostalgic, luscious layers. This easy, no-bake treat is perfect for family gatherings, summer parties, and anyone craving a quick yet impressive dessert that blends classic banana pudding flavors with smooth cheesecake richness.
- Prep Time: 20 minutes
- Cook Time: 0 minutes
- Total Time: 4 hours 20 minutes (including chilling)
- Yield: 8-10 servings 1x
- Category: Dessert
- Method: No-Bake
- Cuisine: American
- Diet: Can be made Gluten Free or Dairy Free with substitutions
Ingredients
Crust
- 2 cups vanilla wafers, crushed into fine crumbs
- 6 tablespoons unsalted butter, melted
Filling
- 16 oz (2 packages) cream cheese, softened
- 1 can (14 oz) sweetened condensed milk
- 1 package (3.4 oz) instant vanilla pudding mix
- 1 1/2 cups whipped topping (such as Cool Whip), thawed
- 3–4 ripe bananas, sliced
Instructions
- Prepare the crust: Start by crushing vanilla wafers into fine crumbs, then combine them with melted butter. Press this mixture firmly into the bottom of a springform pan or a pie dish to form the cheesecake crust. Chill while you prepare the filling.
- Mix the filling: In a large bowl, beat softened cream cheese until smooth. Gradually add in the sweetened condensed milk and instant vanilla pudding mix, stirring until fully combined. Fold in the whipped topping gently to keep the mixture light and fluffy.
- Add the bananas: Slice ripe bananas and layer them over the chilled crust. Then pour half of the filling over the bananas, spreading it evenly. Repeat with a second banana layer and the remaining filling for luscious layers.
- Assemble and chill: Top the final layer of filling with crushed vanilla wafers or a few banana slices for garnish. Cover the cheesecake with plastic wrap and refrigerate for at least 4 hours, ideally overnight, to let it set perfectly.
Notes
- Use ripe bananas with yellow skin and some brown spots for maximum sweetness and softness.
- Beat cream cheese thoroughly until smooth before adding other ingredients.
- Fold whipped topping gently to keep the filling light and airy, avoiding dense texture.
- Allow enough chilling time (at least 4 hours) to ensure the cheesecake holds its shape.
- Layer ingredients evenly for beautiful presentation and balanced flavor.
Nutrition
- Serving Size: 1 slice (1/10 of recipe)
- Calories: 350
- Sugar: 28g
- Sodium: 220mg
- Fat: 22g
- Saturated Fat: 13g
- Unsaturated Fat: 7g
- Trans Fat: 0.5g
- Carbohydrates: 33g
- Fiber: 2g
- Protein: 5g
- Cholesterol: 60mg
Keywords: banana pudding cheesecake, no-bake cheesecake, banana dessert, easy cheesecake, summer dessert, creamy dessert